Quarkus Azure Cosmos DB Extension
Quarkus Azure Services Extensions are developed and supported by Microsoft as part of their commitment to Open Standard Enterprise Java. For more information, see Jakarta EE on Azure.
Azure Cosmos DB is a fully managed NoSQL, relational, and vector database.
This extension allows you to do the full set of data manipulations supported by Azure Cosmos DB by injecting a com.azure.cosmos.CosmosClient object inside your Quarkus application.
This is a step by step guide on how to use the Quarkus Azure Cosmos DB extension. If you’re looking for a complete code sample, you can find it in the Azure Cosmos DB sample.
Installation
Add a dependency on io.quarkiverse.azureservices:quarkus-azure-cosmos.
For instance, with Maven, add the following dependency to your POM file:
<dependency>
    <groupId>io.quarkiverse.azureservices</groupId>
    <artifactId>quarkus-azure-cosmos</artifactId>
    <version>1.2.4</version>
</dependency>
How to Use It
Once you have added the extension to your project, follow the next steps, so you can inject com.azure.cosmos.CosmosClient object in your application to read/write items from/to the specified database and container.
Setup your Azure Environment
First thing first.
For this sample to work, you need to have an Azure account as well as Azure CLI installed.
The Azure CLI is available to install in Windows, macOS and GNU/Linux environments.
Checkout the installation guide.
Then, you need an Azure subscription and log into it by using the az login command.
You can run az version to find the version and az upgrade to upgrade to the latest version.
Create an Azure resource group with the az group create command. A resource group is a logical container into which Azure resources are deployed and managed.
az group create \
    --name rg-quarkus-azure-cosmos \
    --location westus
Create an Azure Cosmos DB account with the following command:
az cosmosdb create \
-n kvquarkusazurecosmos080824 \
-g rg-quarkus-azure-cosmos \
--default-consistency-level Session \
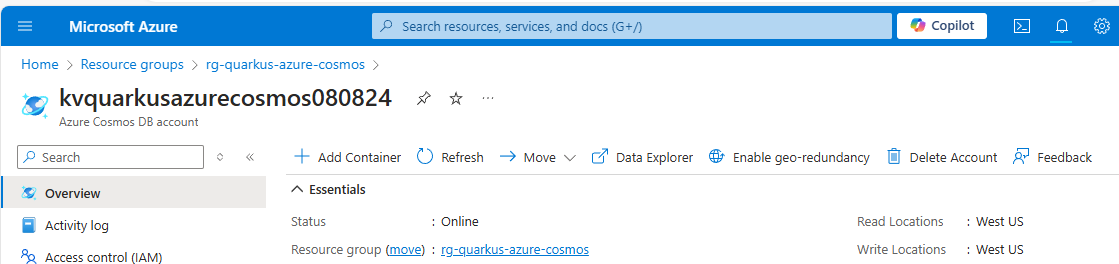
--locations regionName='West US' failoverPriority=0 isZoneRedundant=FalseIf you log into the Azure portal, you can see the resource group and the Azure Cosmos DB account you created.
Run the following commands to create a database demodb and a container democontainer using Azure CLI.
az cosmosdb sql database create \
    -a kvquarkusazurecosmos080824 \
    -g rg-quarkus-azure-cosmos \
    -n demodb
az cosmosdb sql container create \
    -a kvquarkusazurecosmos080824 \
    -g rg-quarkus-azure-cosmos \
    -d demodb \
    -n democontainer \
    -p "/id"
Configure the Azure Cosmos DB Client
As you can see below in the Extension Configuration Reference section, the property quarkus.azure.cosmos.endpoint is required if the extension is enabled.
To get the endpoint of the Azure Cosmos DB account, execute the following Azure CLI command:
export QUARKUS_AZURE_COSMOS_ENDPOINT=$(az cosmosdb show \
    -n kvquarkusazurecosmos080824 \
    -g rg-quarkus-azure-cosmos \
    --query documentEndpoint -o tsv)
echo "QUARKUS_AZURE_COSMOS_ENDPOINT is: ${QUARKUS_AZURE_COSMOS_ENDPOINT}"
Because Quarkus implements the MicroProfile Config specification, the value of the environment variable QUARKUS_AZURE_COSMOS_ENDPOINT is read as if the property quarkus.azure.cosmos.endpoint were set in the application.properties file.
Although technically both approaches work, using environment variable is recommended as it won’t hardcode the configuration in the source code, making it easier to switch between environments and to avoid committing sensitive information to source control.
You have two options to authenticate to Azure Cosmos DB, either with Microsoft Entra ID or key-based authentication. The following sections describe how to authenticate with both options. For optimal security, it is recommended to use Microsoft Entra ID for authentication.
Authenticating to Azure Cosmos DB with Microsoft Entra ID
You can authenticate to Azure Cosmos DB with Microsoft Entra ID. Run the following commands to assign the Cosmos DB Built-in Data Contributor role to the signed-in user as a Microsoft Entra identity.
az ad signed-in-user show --query id -o tsv \
    | az cosmosdb sql role assignment create \
    --account-name kvquarkusazurecosmos080824 \
    --resource-group rg-quarkus-azure-cosmos \
    --scope "/" \
    --principal-id @- \
    --role-definition-id 00000000-0000-0000-0000-000000000002
Notice that you cannot use any Azure Cosmos DB data plane SDK to authenticate management operations with a Microsoft Entra identity, that’s why you created database and container manually before.
Authenticating to Azure Cosmos DB with key-based authentication
You can also authenticate to Azure Cosmos DB with key-based authentication. Run the following commands to export the key of the Azure Cosmos DB account as an environment variable.
export QUARKUS_AZURE_COSMOS_KEY=$(az cosmosdb keys list \
    -n kvquarkusazurecosmos080824 \
    -g rg-quarkus-azure-cosmos \
    --query primaryMasterKey -o tsv)
The value of environment variable QUARKUS_AZURE_COSMOS_KEY will be read by Quarkus as the value of config property quarkus.azure.cosmos.key of azure-cosmos extension in order to set up the connection to the Azure Cosmos DB.
Notice that you do not need to create a database and container manually if you use key-based authentication, because it has full access to the Azure Cosmos DB account. The database and container were created before because the sample code assumes that they exist.
Inject the Azure Cosmos DB Client
Now that your Azure environment is ready and you have configured the extension, you can @Inject the com.azure.cosmos.CosmosClient object in your imperative application, so you can interact with Azure Cosmos DB. For complete API see the Azure SDK for Java Reference Documentation.
Use the CosmosClient in an imperative application
The createItem method first creates the item with request payload in the specified database and container of the Azure Cosmos DB account.
The getItem method reads the item with the id from the specified database and container of the Azure Cosmos DB account.
@Path("/quarkus-azure-cosmos")
@ApplicationScoped
public class CosmosResource {

    @Inject
    CosmosClient cosmosClient;

    @Path("/{database}/{container}")
    @POST
    @Consumes(MediaType.APPLICATION_JSON)
    public Response createItem(
            @PathParam("database") String database,
            @PathParam("container") String container,
            Item body,
            @Context UriInfo uriInfo) {

        cosmosClient.getDatabase(database).getContainer(container).upsertItem(body);
        return Response.created(uriInfo.getAbsolutePathBuilder().path(body.getId()).build()).build();
    }

    @Path("/{database}/{container}/{itemId}")
    @GET
    @Produces(MediaType.APPLICATION_JSON)
    public Response getItem(
            @PathParam("database") String database,
            @PathParam("container") String container,
            @PathParam("itemId") String itemId) {
        CosmosItemResponse<Item> item = cosmosClient.getDatabase(database).getContainer(container).readItem(itemId, new PartitionKey(itemId),
                Item.class);

        return Response.ok().entity(item.getItem()).build();
    }
}
To test this sample you can run the following cURL commands after the application is started:
-
curl http://localhost:8080/quarkus-azure-cosmos/demodb/democontainer -X POST -d '{"id": "1", "name": "sync-item"}' -H "Content-Type: application/json" -
curl http://localhost:8080/quarkus-azure-cosmos/demodb/democontainer/1 -X GET
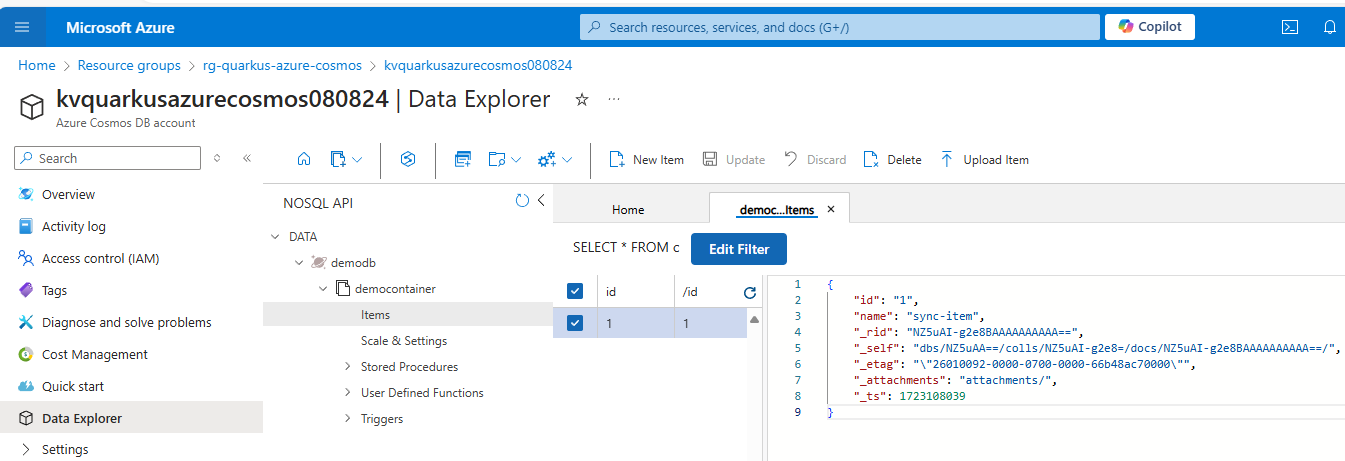
You can go back to the Azure portal, open Data Explorer of the Azure Cosmos DB account, and see the item that you’ve created.
Extension Configuration Reference
Configuration property fixed at build time - All other configuration properties are overridable at runtime
Configuration property |
Type |
Default |
|---|---|---|
If Dev Services for Azure Cosmos DB has been explicitly enabled or disabled. Environment variable: |
boolean |
|
Indicates if the Cosmos instance managed by Quarkus Dev Services is shared. When shared, Quarkus looks for running containers using label-based service discovery. If a matching container is found, it is used, and so a second one is not started. Otherwise, Dev Services for Azure Storage Blob starts a new container. The discovery uses the Container sharing is only used in dev mode. Environment variable: |
boolean |
|
The value of the This property is used when you need multiple shared azurite instances. Environment variable: |
string |
|
The flag to enable the cosmos. If set to false, the cosmos will be disabled Environment variable: |
boolean |
|
The endpoint of Azure Cosmos DB. Required if quarkus.azure.cosmos.enabled is set to true Environment variable: |
string |
|
Whether to use the default GATEWAY mode. If set to true, the default gateway mode will be used. Environment variable: |
boolean |
|
The key of Azure Cosmos DB. Optional and can be empty if the Azure Identity is used to authenticate Environment variable: |
string |