 Quarkus Azure Services Extensions
Quarkus Azure App Configuration Extension
Quarkus Azure Services Extensions are developed and supported by Microsoft as part of their commitment to Open Standard Enterprise Java. For more information, see Jakarta EE on Azure.
Azure App Configuration is a fast, scalable parameter storage for app configuration.
This extension allows to inject a io.smallrye.config.SmallRyeConfig object inside your Quarkus application so you can access the app configuration stored in Azure.
Installation
If you want to use this extension, you need to add the io.quarkiverse.azureservices:quarkus-azure-app-configuration extension first to your build file.
For instance, with Maven, add the following dependency to your POM file:
<dependency>
    <groupId>io.quarkiverse.azureservices</groupId>
    <artifactId>quarkus-azure-app-configuration</artifactId>
    <version>1.2.4</version>
</dependency>
How to Use It
Once you have added the extension to your project, follow the next steps, so you can inject io.smallrye.config.SmallRyeConfig object in your application to store and read blobs.
Setup your Azure Environment
First thing first.
For this sample to work, you need to have an Azure account as well as Azure CLI installed.
The Azure CLI is available to install in Windows, macOS and GNU/Linux environments.
Checkout the installation guide.
Then, you need an Azure subscription and log into it by using the az login command.
You can run az version to find the version and az upgrade to upgrade to the latest version.
Create an Azure resource group with the az group create command. A resource group is a logical container into which Azure resources are deployed and managed.
az group create \
    --name rg-quarkus-azure-app-configuration \
    --location eastus
Create an Azure App Configuration store with the following command:
az appconfig create \
    --name appcs-quarkus-azure-app-configuration \
    --resource-group rg-quarkus-azure-app-configuration \
    --location eastus
Then create some key-value properties with the following commands:
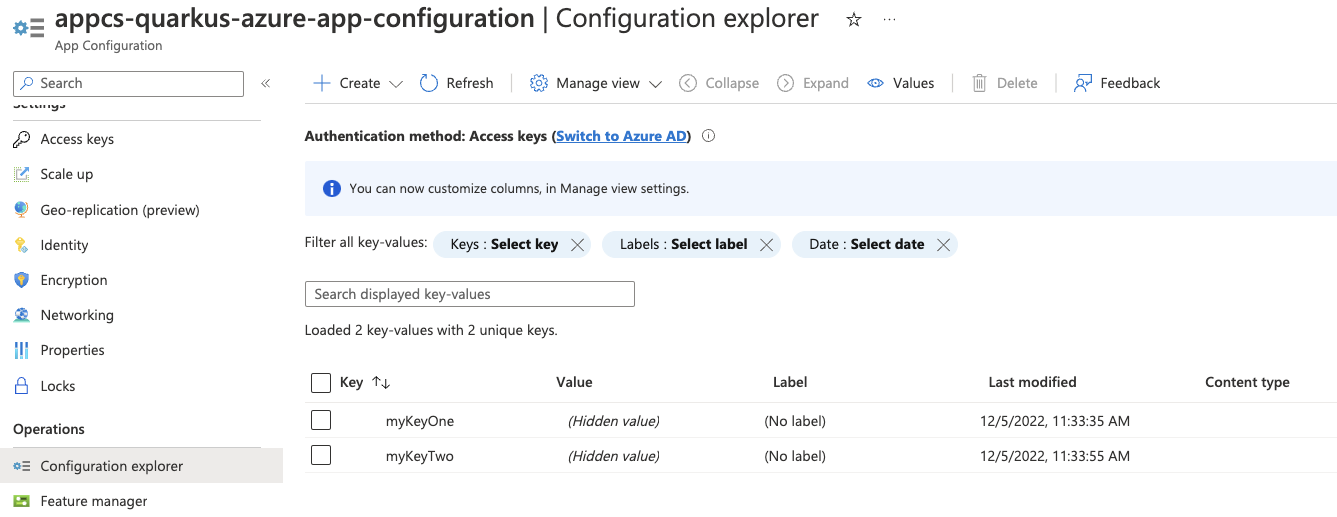
az appconfig kv set --name appcs-quarkus-azure-app-configuration --yes --key myKeyOne --value "Value 1"
az appconfig kv set --name appcs-quarkus-azure-app-configuration --yes --key myKeyTwo --value "Value 2"
You can list the key-value properties with the following command:
az appconfig kv list --name appcs-quarkus-azure-app-configurationIf you log into the Azure portal, you can see the resource group and the key-value you created.
Configure the Azure App Configuration Client
As you can see below in the Configuration Reference section, the property quarkus.azure.app.configuration.endpoint is required if the extension is enabled.
For that, execute the following Azure CLI command:
export QUARKUS_AZURE_APP_CONFIGURATION_ENDPOINT=$(az appconfig show \
  --resource-group rg-quarkus-azure-app-configuration \
  --name appcs-quarkus-azure-app-configuration \
  --query endpoint -o tsv)
Notice that you get the endpoint and set it to environment variable QUARKUS_AZURE_APP_CONFIGURATION_ENDPOINT, instead of setting it to property quarkus.azure.app.configuration.endpoint in the application.properties file.
Although technically both approaches work, using environment variable is recommended and more secure as there’s no risk of committing the connection information to source control.
To be able to connect to the Azure App Configuration that you’ve just created, you have two options to authenticate to Azure App Configuration, either with Microsoft Entra ID or access keys. The following sections describe how to authenticate with both options. For optimal security, it is recommended to use Microsoft Entra ID for authentication.
Authenticating to Azure App Configuration with Microsoft Entra ID
You can authenticate to Azure App Configuration with Microsoft Entra ID. Run the following commands to assign the App Configuration Data Reader role to the signed-in user as a Microsoft Entra identity.
# Retrieve the app configuration resource ID
APP_CONFIGURATION_RESOURCE_ID=$(az appconfig show \
    --resource-group rg-quarkus-azure-app-configuration \
    --name appcs-quarkus-azure-app-configuration \
    --query 'id' \
    --output tsv)
# Assign the "App Configuration Data Reader" role to the current signed-in identity
az role assignment create \
    --assignee $(az ad signed-in-user show --query 'id' --output tsv) \
    --role "App Configuration Data Reader" \
    --scope $APP_CONFIGURATION_RESOURCE_ID
Authenticating to Azure App Configuration with access keys
You can also authenticate to Azure App Configuration with access keys. Run the following commands to export the Azure App Configuration access keys as environment variables.
credential=$(az appconfig credential list \
    --name appcs-quarkus-azure-app-configuration \
    --resource-group rg-quarkus-azure-app-configuration \
    | jq 'map(select(.readOnly == true)) | .[0]')
export QUARKUS_AZURE_APP_CONFIGURATION_ID=$(echo "${credential}" | jq -r '.id')
export QUARKUS_AZURE_APP_CONFIGURATION_SECRET=$(echo "${credential}" | jq -r '.value')
Notice that you get the id and secret and set them to environment variables QUARKUS_AZURE_APP_CONFIGURATION_ID and QUARKUS_AZURE_APP_CONFIGURATION_SECRET,
instead of setting them to properties quarkus.azure.app.configuration.id and quarkus.azure.app.configuration.secret in the application.properties file, with the similar reasons as mentioned above.
Inject the SmallRyeConfig
Now that your Azure environment is ready and that you have configured the extension, you can inject the SmallRyeConfig object in your application, so you can interact with Azure App Configuration.
@Path("/config")
@Produces(MediaType.APPLICATION_JSON)
public class ConfigResource {

  @Inject
  SmallRyeConfig config;

  @GET
  @Path("/{name}")
  public Response configValue(@PathParam("name") final String name) {
      return Response.ok(config.getConfigValue(name)).build();
  }
}
To test this sample you can run the following cURL commands after the application is started:
-
curl -X GET localhost:8080/config/myKeyOne -
curl -X GET localhost:8080/config/myKeyTwo
Extension Configuration Reference
Configuration property fixed at build time - All other configuration properties are overridable at runtime
Configuration property |
Type |
Default |
|---|---|---|
The flag to enable the app configuration. If set to false, the app configuration will be disabled Environment variable: |
boolean |
|
The endpoint of the app configuration. Required if quarkus.azure.app.configuration.enabled is set to true Environment variable: |
string |
|
The id of the app configuration. Required if quarkus.azure.app.configuration.enabled is set to true and access keys are used for authentication Environment variable: |
string |
|
The secret of the app configuration. Required if quarkus.azure.app.configuration.enabled is set to true and access keys are used for authentication Environment variable: |
string |
|
The label filter of the app configuration. Use comma as separator for multiple label names Environment variable: |
string |
Quarkus Azure Cosmos DB Extension
Quarkus Azure Services Extensions are developed and supported by Microsoft as part of their commitment to Open Standard Enterprise Java. For more information, see Jakarta EE on Azure.
Azure Cosmos DB is a fully managed NoSQL, relational, and vector database.
This extension allows you to do the full set of data manipulations supported by Azure Cosmos DB by injecting a com.azure.cosmos.CosmosClient object inside your Quarkus application.
This is a step by step guide on how to use the Quarkus Azure Cosmos DB extension. If you’re looking for a complete code sample, you can find it in the Azure Cosmos DB sample.
Installation
Add a dependency on io.quarkiverse.azureservices:quarkus-azure-cosmos.
For instance, with Maven, add the following dependency to your POM file:
<dependency>
    <groupId>io.quarkiverse.azureservices</groupId>
    <artifactId>quarkus-azure-cosmos</artifactId>
    <version>1.2.4</version>
</dependency>
How to Use It
Once you have added the extension to your project, follow the next steps, so you can inject com.azure.cosmos.CosmosClient object in your application to read/write items from/to the specified database and container.
Setup your Azure Environment
First thing first.
For this sample to work, you need to have an Azure account as well as Azure CLI installed.
The Azure CLI is available to install in Windows, macOS and GNU/Linux environments.
Checkout the installation guide.
Then, you need an Azure subscription and log into it by using the az login command.
You can run az version to find the version and az upgrade to upgrade to the latest version.
Create an Azure resource group with the az group create command. A resource group is a logical container into which Azure resources are deployed and managed.
az group create \
    --name rg-quarkus-azure-cosmos \
    --location westus
Create an Azure Cosmos DB account with the following command:
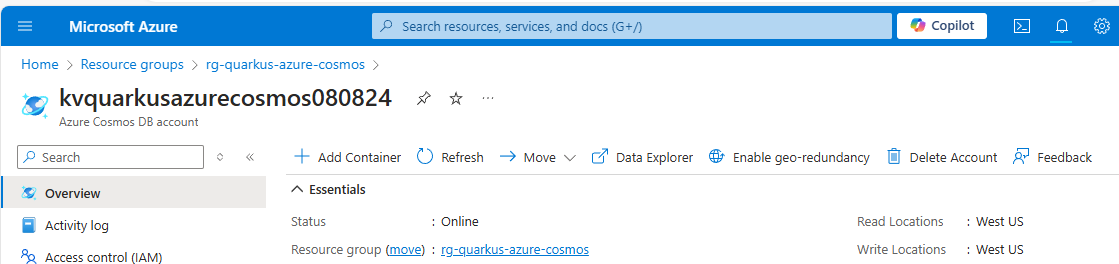
az cosmosdb create \
    -n kvquarkusazurecosmos080824 \
    -g rg-quarkus-azure-cosmos \
    --default-consistency-level Session \
    --locations regionName='West US' failoverPriority=0 isZoneRedundant=False
If you log into the Azure portal, you can see the resource group and the Azure Cosmos DB account you created.
Run the following commands to create a database demodb and a container democontainer using Azure CLI.
az cosmosdb sql database create \
    -a kvquarkusazurecosmos080824 \
    -g rg-quarkus-azure-cosmos \
    -n demodb
az cosmosdb sql container create \
    -a kvquarkusazurecosmos080824 \
    -g rg-quarkus-azure-cosmos \
    -d demodb \
    -n democontainer \
    -p "/id"
Configure the Azure Cosmos DB Client
As you can see below in the Extension Configuration Reference section, the property quarkus.azure.cosmos.endpoint is required if the extension is enabled.
To get the endpoint of the Azure Cosmos DB account, execute the following Azure CLI command:
export QUARKUS_AZURE_COSMOS_ENDPOINT=$(az cosmosdb show \
    -n kvquarkusazurecosmos080824 \
    -g rg-quarkus-azure-cosmos \
    --query documentEndpoint -o tsv)
echo "QUARKUS_AZURE_COSMOS_ENDPOINT is: ${QUARKUS_AZURE_COSMOS_ENDPOINT}"
Because Quarkus implements the MicroProfile Config specification, the value of the environment variable QUARKUS_AZURE_COSMOS_ENDPOINT is read as if the property quarkus.azure.cosmos.endpoint were set in the application.properties file.
Although technically both approaches work, using environment variable is recommended as it won’t hardcode the configuration in the source code, making it easier to switch between environments and to avoid committing sensitive information to source control.
You have two options to authenticate to Azure Cosmos DB, either with Microsoft Entra ID or key-based authentication. The following sections describe how to authenticate with both options. For optimal security, it is recommended to use Microsoft Entra ID for authentication.
Authenticating to Azure Cosmos DB with Microsoft Entra ID
You can authenticate to Azure Cosmos DB with Microsoft Entra ID. Run the following commands to assign the Cosmos DB Built-in Data Contributor role to the signed-in user as a Microsoft Entra identity.
az ad signed-in-user show --query id -o tsv \
    | az cosmosdb sql role assignment create \
    --account-name kvquarkusazurecosmos080824 \
    --resource-group rg-quarkus-azure-cosmos \
    --scope "/" \
    --principal-id @- \
    --role-definition-id 00000000-0000-0000-0000-000000000002
Notice that you cannot use any Azure Cosmos DB data plane SDK to authenticate management operations with a Microsoft Entra identity, that’s why you created database and container manually before.
Authenticating to Azure Cosmos DB with key-based authentication
You can also authenticate to Azure Cosmos DB with key-based authentication. Run the following commands to export the key of the Azure Cosmos DB account as an environment variable.
export QUARKUS_AZURE_COSMOS_KEY=$(az cosmosdb keys list \
    -n kvquarkusazurecosmos080824 \
    -g rg-quarkus-azure-cosmos \
    --query primaryMasterKey -o tsv)
The value of environment variable QUARKUS_AZURE_COSMOS_KEY will be read by Quarkus as the value of config property quarkus.azure.cosmos.key of azure-cosmos extension in order to set up the connection to the Azure Cosmos DB.
Notice that you do not need to create a database and container manually if you use key-based authentication, because it has full access to the Azure Cosmos DB account. The database and container were created before because the sample code assumes that they exist.
Inject the Azure Cosmos DB Client
Now that your Azure environment is ready and you have configured the extension, you can @Inject the com.azure.cosmos.CosmosClient object in your imperative application, so you can interact with Azure Cosmos DB. For complete API see the Azure SDK for Java Reference Documentation.
Use the CosmosClient in an imperative application
The createItem method first creates the item with request payload in the specified database and container of the Azure Cosmos DB account.
The getItem method reads the item with the id from the specified database and container of the Azure Cosmos DB account.
@Path("/quarkus-azure-cosmos")
@ApplicationScoped
public class CosmosResource {

    @Inject
    CosmosClient cosmosClient;

    @Path("/{database}/{container}")
    @POST
    @Consumes(MediaType.APPLICATION_JSON)
    public Response createItem(
            @PathParam("database") String database,
            @PathParam("container") String container,
            Item body,
            @Context UriInfo uriInfo) {

        cosmosClient.getDatabase(database).getContainer(container).upsertItem(body);
        return Response.created(uriInfo.getAbsolutePathBuilder().path(body.getId()).build()).build();
    }

    @Path("/{database}/{container}/{itemId}")
    @GET
    @Produces(MediaType.APPLICATION_JSON)
    public Response getItem(
            @PathParam("database") String database,
            @PathParam("container") String container,
            @PathParam("itemId") String itemId) {
        CosmosItemResponse<Item> item = cosmosClient.getDatabase(database).getContainer(container).readItem(itemId, new PartitionKey(itemId),
                Item.class);

        return Response.ok().entity(item.getItem()).build();
    }
}
To test this sample you can run the following cURL commands after the application is started:
-
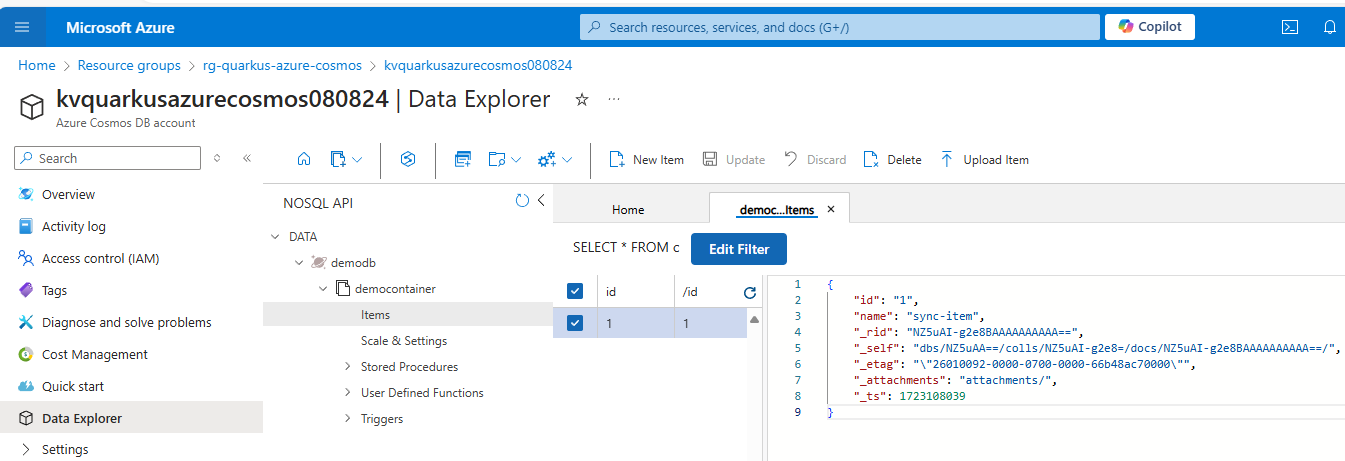
curl http://localhost:8080/quarkus-azure-cosmos/demodb/democontainer -X POST -d '{"id": "1", "name": "sync-item"}' -H "Content-Type: application/json" -
curl http://localhost:8080/quarkus-azure-cosmos/demodb/democontainer/1 -X GET
You can go back to the Azure portal, open Data Explorer of the Azure Cosmos DB account, and see the item that you’ve created.
Extension Configuration Reference
Configuration property fixed at build time - All other configuration properties are overridable at runtime
Configuration property |
Type |
Default |
|---|---|---|
If Dev Services for Azure Cosmos DB has been explicitly enabled or disabled. Environment variable: |
boolean |
|
Indicates if the Cosmos instance managed by Quarkus Dev Services is shared. When shared, Quarkus looks for running containers using label-based service discovery. If a matching container is found, it is used, and so a second one is not started. Otherwise, Dev Services for Azure Storage Blob starts a new container. The discovery uses the Container sharing is only used in dev mode. Environment variable: |
boolean |
|
The value of the This property is used when you need multiple shared azurite instances. Environment variable: |
string |
|
The flag to enable the cosmos. If set to false, the cosmos will be disabled Environment variable: |
boolean |
|
The endpoint of Azure Cosmos DB. Required if quarkus.azure.cosmos.enabled is set to true Environment variable: |
string |
|
Whether to use the default GATEWAY mode. If set to true, the default gateway mode will be used. Environment variable: |
boolean |
|
The key of Azure Cosmos DB. Optional and can be empty if the Azure Identity is used to authenticate Environment variable: |
string |
Quarkus Azure Event Hubs Extension
Quarkus Azure Services Extensions are developed and supported by Microsoft as part of their commitment to Open Standard Enterprise Java. For more information, see Jakarta EE on Azure.
Azure Event Hubs is a big data streaming platform and event ingestion service. It can receive and process millions of events per second. This extension allows you to produce and consume events from Azure Event Hubs by injecting com.azure.messaging.eventhubs.EventHubProducerClient, com.azure.messaging.eventhubs.EventHubConsumerClient, com.azure.messaging.eventhubs.EventHubProducerAsyncClient, and com.azure.messaging.eventhubs.EventHubConsumerAsyncClient objects in your Quarkus application.
This is a step by step guide on how to use the Quarkus Azure Event Hubs extension wity sync clients. . If you’re looking for a complete code sample, you can find it in the Azure Event Hubs sample.
Installation
Add a dependency on io.quarkiverse.azureservices:quarkus-azure-eventhubs.
For instance, with Maven, add the following dependency to your POM file:
<dependency>
    <groupId>io.quarkiverse.azureservices</groupId>
    <artifactId>quarkus-azure-eventhubs</artifactId>
    <version>1.2.4</version>
</dependency>
How to Use It
Once you have added the extension to your project, follow the next steps, so you can inject com.azure.messaging.eventhubs.EventHubProducerClient or com.azure.messaging.eventhubs.EventHubConsumerClient object in your application to produce and consume events from Azure Event Hubs.
Setup your Azure Environment
First thing first.
For this sample to work, you need to have an Azure account as well as Azure CLI installed.
The Azure CLI is available to install in Windows, macOS and GNU/Linux environments.
Checkout the installation guide.
Then, you need an Azure subscription and log into it by using the az login command.
You can run az version to find the version and az upgrade to upgrade to the latest version.
Create an Azure resource group with the az group create command. A resource group is a logical container into which Azure resources are deployed and managed.
az group create \
    --name rg-quarkus-azure-eventhubs \
    --location westus
Create an Azure Event Hubs namespace with the following command:
az eventhubs namespace create \
    --name ehnamespace20241217 \
    --resource-group rg-quarkus-azure-eventhubs
az eventhubs eventhub create \
    --name eventhub1217 \
    --namespace-name ${EVENTHUBS_NAMESPACE} \
    --resource-group rg-quarkus-azure-eventhubs \
    --partition-count 2
If you log into the Azure portal, you can see the resource group and the Azure Event Hubs namespace you created.
Next, assign the Azure Event Hubs Data Owner role to the signed-in user, so that the sample application can do data plane operations.
EVENTHUBS_EVENTHUB_RESOURCE_ID=$(az eventhubs eventhub show \
    --resource-group rg-quarkus-azure-eventhubs \
    --namespace-name ehnamespace20241217 \
    --name eventhub1217 \
    --query 'id' \
    --output tsv)
az role assignment create \
    --role "Azure Event Hubs Data Owner" \
    --assignee $(az ad signed-in-user show --query 'id' --output tsv) \
    --scope $EVENTHUBS_EVENTHUB_RESOURCE_ID
Configure the Azure Event Hubs Extension
As you can see below in the Extension Configuration Reference section, the property quarkus.azure.eventhubs.namespace and quarkus.azure.eventhubs.event-hub-name are required.
Execute the following Azure CLI command to export the environment variables so that the extension can read the values.
export QUARKUS_AZURE_EVENTHUBS_NAMESPACE=${EVENTHUBS_NAMESPACE}
export QUARKUS_AZURE_EVENTHUBS_EVENTHUB_NAME=${EVENTHUBS_EVENTHUB_NAME}
Because Quarkus implements the MicroProfile Config specification, the value of the environment variables QUARKUS_AZURE_EVENTHUBS_NAMESPACE and QUARKUS_AZURE_EVENTHUBS_EVENTHUB_NAME is read as if the properties quarkus.azure.eventhubs.namespace and quarkus.azure.eventhubs.event-hub-name were set in the application.properties file.
Although technically both approaches work, using environment variable is recommended and more secure as there’s no risk of committing the connection string to source control.
Inject the Azure Event Hubs Client
Now that your Azure environment is ready and you have configured the extension, you can @Inject the com.azure.messaging.eventhubs.EventHubProducerClient object in your imperative application or @Inject the com.azure.messaging.eventhubs.EventHubConsumerClient object in your reactive application, so you can interact with Azure Event Hubs. For complete API see the Azure SDK for Java Reference Documentation.
Use the EventHubProducerClient and EventHubConsumerClient in a Quarkus application
@Path("/quarkus-azure-eventhubs")
@ApplicationScoped
public class EventhubsResource {
    private static final Logger LOGGER = LoggerFactory.getLogger(EventhubsResource.class);

    @Inject
    EventHubProducerClient producer;

    @Inject
    EventHubConsumerClient consumer;

    @Path("/publishEvents")
    @GET
    public void publishEvents() {
        List<EventData> allEvents = Arrays.asList(new EventData("Foo"), new EventData("Bar"));
        producer.send(allEvents, new SendOptions().setPartitionId("0"));
    }

    @Path("/consumeEvents")
    @GET
    public void consumeEvents() {

        LOGGER.info("Receiving message using Event Hub consumer client.");
        String PARTITION_ID = "0";
        // Reads events from partition '0' and returns the first 2 received.
        IterableStream<PartitionEvent> events = consumer.receiveFromPartition(PARTITION_ID, 2,
                EventPosition.earliest());

        for (PartitionEvent partitionEvent : events) {
            // For each event, perform some sort of processing.
            LOGGER.info("Message Body received: " + partitionEvent.getData().getBodyAsString());
            LOGGER.info("Message SequenceNumber is: " + partitionEvent.getData().getSequenceNumber());
        }
    }
}
To test this sample you can run the following cURL commands after the application is started:
You should see similar output in the logs:
Message Body received: Foo
Message SequenceNumber is: 0
Message Body received: Bar
Message SequenceNumber is: 1
Extension Configuration Reference
Configuration property fixed at build time - All other configuration properties are overridable at runtime
Configuration property |
Type |
Default |
|---|---|---|
The flag to enable the eventhubs. If set to false, the eventhubs will be disabled Environment variable: |
boolean |
|
The namespace of the event hub. Required if quarkus.azure.eventhubs.enabled is set to true Environment variable: |
string |
|
The domain name of the event hub. Required if quarkus.azure.eventhubs.enabled is set to true Environment variable: |
string |
|
The name of the event hub. Required if quarkus.azure.eventhubs.enabled is set to true Environment variable: |
string |
Quarkus Azure Key Vault Extension
Quarkus Azure Services Extensions are developed and supported by Microsoft as part of their commitment to Open Standard Enterprise Java. For more information, see Jakarta EE on Azure.
Azure Key Vault is a cloud service for securely storing and accessing secrets. A secret is anything that you want to tightly control access to, such as API keys, passwords, certificates, or cryptographic keys. This extension allows you to:
-
Create and retrieve secrets from Azure Key Vault by injecting the one or both of the following objects in a Quarkus application.
-
com.azure.security.keyvault.secrets.SecretClient -
com.azure.security.keyvault.secrets.SecretAsyncClient
-
-
Use secrets from the key vault directly inside your
application.properties.
The extension produces SecretClient and SecretAsyncClient using DefaultAzureCredential.
Developers who want more control or whose scenario isn’t served by the default settings should build their clients using other credential types.
Installation
Add the io.quarkiverse.azureservices:quarkus-azure-keyvault extension first to your build file.
For instance, with Maven, add the following dependency to your POM file:
<dependency>
    <groupId>io.quarkiverse.azureservices</groupId>
    <artifactId>quarkus-azure-keyvault</artifactId>
    <version>1.2.4</version>
</dependency>
How to Use It
Once you have added the extension to your project, follow the next steps, so you can inject com.azure.security.keyvault.secrets.SecretClient or com.azure.security.keyvault.secrets.SecretAsyncClient in your application to manage secrets.
Setup your Azure Environment
First thing first.
For this sample to work, you need to have an Azure account as well as Azure CLI installed.
The Azure CLI is available to install in Windows, macOS and GNU/Linux environments.
Checkout the installation guide.
Then, you need an Azure subscription and log into it by using the az login command.
You can run az version to find the version and az upgrade to upgrade to the latest version.
Create an Azure resource group with the az group create command.
A resource group is a logical container into which Azure resources are deployed and managed.
az group create \
    --name rg-quarkus-azure-keyvault \
    --location eastus
Create a general-purpose key vault with the following command:
az keyvault create --name kvquarkusazurekv0423 \
    --resource-group rg-quarkus-azure-keyvault \
    --location eastus \
    --enable-rbac-authorization false
Key Vault provides secure storage of generic secrets, such as passwords and database connection strings. All secrets in your key vault are stored encrypted. The Azure Key Vault service encrypts your secrets when you add them, and decrypts them automatically when you read them.
The command creating key vault has assigned all secret permissions(backup, delete, get, list, purge, recover, restore, set) to your signed in identity:
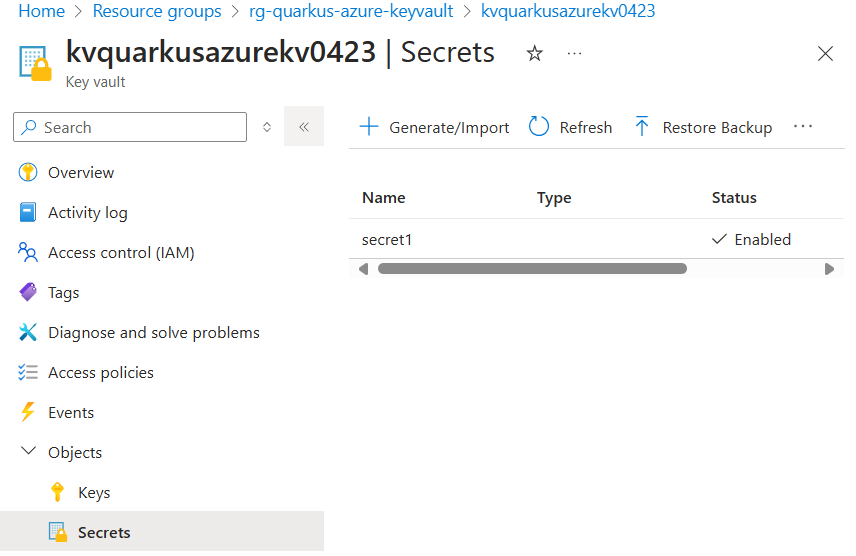
Create a secret secret1 with value mysecret.
az keyvault secret set \
    --vault-name kvquarkusazurekv0423 \
    --name secret1 \
    --value mysecret
If you sign into the Azure portal, you can see the key vault you created. Select Objects → Secrets, you will find the Secrets page.
Configure the Azure Key Vault Secret Client
As you can see below in the Configuration Reference section, the configuration option quarkus.azure.keyvault.secret.endpoint is mandatory.
To get the endpoint, execute the following Azure CLI command:
export QUARKUS_AZURE_KEYVAULT_SECRET_ENDPOINT=$(az keyvault show --name kvquarkusazurekv0423 \
    --resource-group rg-quarkus-azure-keyvault \
    --query properties.vaultUri \
    --output tsv)
Notice that you get the endpoint and set it to environment variable QUARKUS_AZURE_KEYVAULT_SECRET_ENDPOINT, instead of setting it to property quarkus.azure.keyvault.secret.endpoint in the application.properties file.
Due to Quarkus implementing the MicroProfile Config specification, both approaches work. Using the environment variable is recommended, more flexible and more secure as there’s no risk of committing the endpoint to source control.
Read Secrets as Properties
You can load and reference secrets from Azure Key Vault in your application.properties file by using the following syntax. A hierarchical approach is supported, similar to that found in Google Cloud Secret Manager.
The syntax supports loading secrets from multiple key vault. Default key vault is configed with quarkus.azure.keyvault.secret.endpoint.
# 1. Load secret from default key vault  - specify the secret name and use the latest version
${kv//<secret-name>}

# 2. Load secret from default key vault - specify the secret name and version
${kv//<secret-name>/versions/<version-id>}

# 3. Load secret from a specified key vault - specify key vault name, secret name, and use latest version
${kv//<keyvault-name>/<secret-name>}

# 4. Load secret from a specified key vault - specify key vault name, secret name, and use latest version
${kv//<keyvault-name>/secrets/<secret-name>}

# 5. Load secret from a specified key vault - specify key vault name, secret name, and version
${kv//<keyvault-name>/secrets/<secret-name>/<version-id>}

# 6. Load secret from a specified key vault - specify key vault name, secret name, and version
${kv//<keyvault-name>/secret/<secret-name>/versions/<version-id>}
You can use this syntax to load secrets directly from application.properties:
@ConfigProperty(name = "kv//secret1")
String secret;
Inject the Azure Key Vault Secret Client
Now that your Azure environment is ready and that you have configured the extension, you can inject the com.azure.security.keyvault.secrets.SecretClient object in your application, so you can interact with Azure Key Vault Secret.
This is a Quarkus CLI application. The application will:
-
Ask for a secret value.
-
Create a secret with name
mySecretand set its value. -
Retrieve and print the secret value.
-
Delete the secret.
You can build and run the application in development mode using command:
quarkus dev@QuarkusMain
public class KeyVaultSecretApplication implements QuarkusApplication {
@Inject
SecretClient secretClient;
@ConfigProperty(name = "kv//secret1")
String secret;
@Override
public int run(String... args) throws Exception {
System.out.println("Print secret1: " + secret);
Console con = System.console();
String secretName = "mySecret";
System.out.println("Create secret: " + secretName);
System.out.println("Please provide the value of your secret > ");
String secretValue = con.readLine();
System.out.println("Creating a secret called '" + secretName + "' with value '" + secretValue + "' ... ");
secretClient.setSecret(new KeyVaultSecret(secretName, secretValue));
System.out.println("Retrieving your secret...");
KeyVaultSecret retrievedSecret = secretClient.getSecret(secretName);
System.out.println("Your secret's value is '" + retrievedSecret.getValue() + "'.");
System.out.println("Deleting your secret ... ");
SyncPoller<DeletedSecret, Void> deletionPoller = secretClient.beginDeleteSecret(secretName);
deletionPoller.waitForCompletion();
System.out.println("done.");
return 0;
}
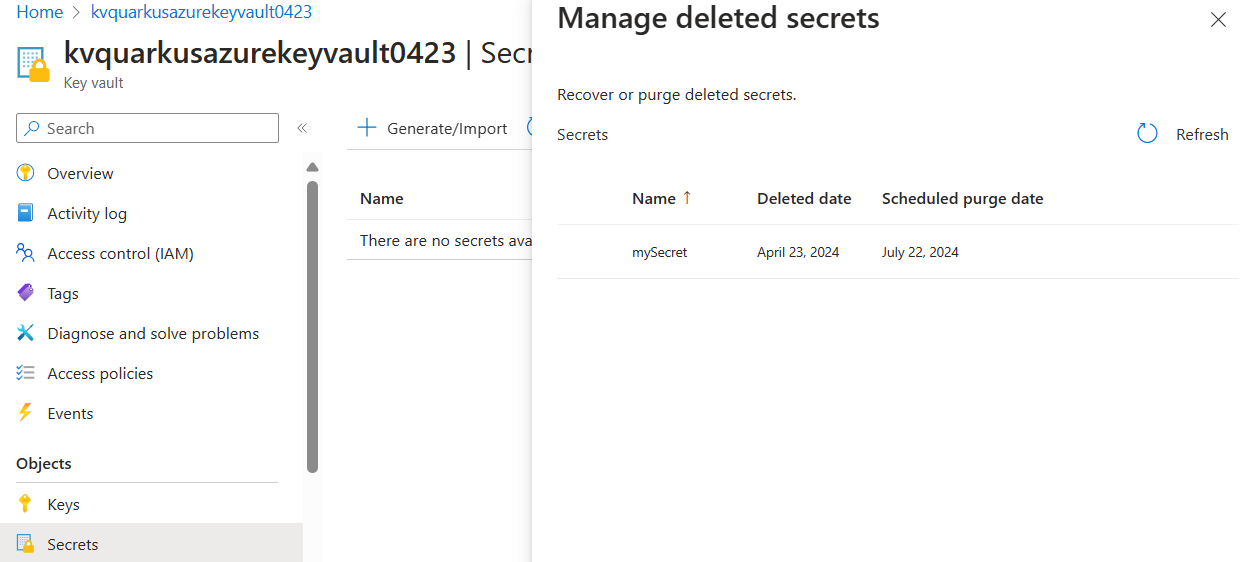
}After running the application, if you log into the Azure portal, you can see the key vault and the secret you created. As the secret is deleted, you will find the secret from Objects → Secrets → Manage deleted secrets.
You can also inject com.azure.security.keyvault.secrets.SecretAsyncClient object to your application. For more usage, see com.azure.security.keyvault.secrets.secretasyncclient.
After the testing, for security consideration, you can rotate the policy with command:
az ad signed-in-user show --query id -o tsv \
    | az keyvault delete-policy \
    --name kvquarkusazurekv0423 \
    --object-id @-
Dev Service
The Dev Service of this extension launch an Lowkey Vault emulator in dev and test mode.
The SecretClient and SecretAsyncClient instances produced by this extension will be automatically configured to use the emulator’s connection string when running in dev or test mode through the quarkus.azure.keyvault.secret.endpoint property.
Prerequisites for Managed Identity simulation
The credentials used by the aforementioned clients will be also automatically configured based on the existence of the properties under quarkus.azure.keyvault.secret.local-configuration.basic-authentication. This can be disabled by setting the quarkus.azure.keyvault.devservices.managed-identity.token-port property in the Dev Service configuration. Setting the port number explicitly will switch authentication to use a simulated Azure Managed Identity token endpoint.
In order to make managed identity work, you must explicitly set the following environment variables:
-
IDENTITY_ENDPOINT=http://localhost:<token_port>/metadata/identity/oauth2/tokenwhere the<token_port>placeholder must match the token port of the Dev Service configuration. -
IDENTITY_HEADER=header
Pre-populate the Key Vault with secrets
You can instruct the Dev Service to set secrets with pre-defined values after start-up by setting the key-value pairs of the map under the quarkus.azure.keyvault.devservices.pre-set-secrets configuration property.
For example:
quarkus.azure.keyvault.devservices.pre-set-secrets.secret1=value1
quarkus.azure.keyvault.devservices.pre-set-secrets.secret2=value2Extension Configuration Reference
Configuration property fixed at build time - All other configuration properties are overridable at runtime
Configuration property |
Type |
Default |
|---|---|---|
If Dev Services for Azure Key Vault has been explicitly enabled or disabled. Environment variable: |
boolean |
|
The container image name of Lowkey Vault. See the artifact registry for available tags of the default image. This extension has been tested and verified working with version Environment variable: |
string |
|
Specify the token port for the managed identity server. Environment variable: |
int |
|
Set to true to automatically merge the Lowkey Vault SSL keystore with the application keystore. Environment variable: |
boolean |
|
A map of secret names and values to pre-set in the Lowkey Vault instance. Environment variable: |
Map<String,String> |
|
The flag to enable the key vault secret. If set to false, the key vault secret will be disabled Environment variable: |
boolean |
|
The endpoint of Azure Key Vault Secret. Required if quarkus.azure.keyvault.secret.enabled is set to true Environment variable: |
string |
|
The flag to disable the challenge resource verification. If set to false, the verification remains enabled. Environment variable: |
boolean |
|
The username part of the basic authentication token. Environment variable: |
string |
required |
The password part of the basic authentication token. Environment variable: |
string |
required |
Quarkus Azure Service Bus Extension
Quarkus Azure Services Extensions are developed and supported by Microsoft as part of their commitment to Open Standard Enterprise Java. For more information, see Jakarta EE on Azure.
Azure Service Bus is a fully managed enterprise message broker with message queues and publish-subscribe topics. Service Bus is used to decouple applications and services from each other.
This extension provides the following benefits:
-
It resolves native build issues so that applications using the Azure Service Bus with the Azure SDK for Java can be compiled to a native image.
-
It injects
com.azure.messaging.servicebus.ServiceBusClientBuilderinstances that can be used to create clients for an Azure Service Bus that send and consume messages. -
The Dev Services launch an Azure Service Bus emulator in dev and test mode and configure the injected builders to use it.
This is a step by step guide on how to use the Quarkus Azure Service Bus extension. If you’re looking for a complete code sample, you can find it in the Azure Service Bus sample.
Installation
Add a dependency on io.quarkiverse.azureservices:quarkus-azure-servicebus.
For instance, with Maven, add the following dependency to your POM file:
<dependency>
    <groupId>io.quarkiverse.azureservices</groupId>
    <artifactId>quarkus-azure-servicebus</artifactId>
    <version>1.2.4</version>
</dependency>
How to Use It
Once you have added the extension to your project, follow the next steps, so you can inject com.azure.messaging.servicebus.ServiceBusClientBuilder object in your application to create clients for producing and consuming messages from Azure Service Bus.
Setup your Azure Environment
First thing first.
For this sample to work, you need to have an Azure account as well as Azure CLI installed.
The Azure CLI is available to install in Windows, macOS and GNU/Linux environments.
Checkout the installation guide.
Then, you need an Azure subscription and log into it by using the az login command.
You can run az version to find the version and az upgrade to upgrade to the latest version.
Create an Azure resource group with the az group create command. A resource group is a logical container into which Azure resources are deployed and managed.
az group create \
    --name rg-quarkus-azure-servicebus \
    --location westus
Create an Azure Service Bus namespace and a queue with the following commands:
az servicebus namespace create \
    --name sbnamespace20250604 \
    --resource-group rg-quarkus-azure-servicebus

az servicebus queue create \
    --name test-queue \
    --namespace-name sbnamespace20250604 \
    --resource-group rg-quarkus-azure-servicebus
If you log into the Azure portal, you can see the resource group and the Azure Service Bus namespace you created.
Configure the Azure Service Bus Client Builder
As you can see below in the Extension Configuration Reference section, either the property quarkus.azure.servicebus.namespace or the property quarkus.azure.servicebus.connection-string is required if the extension is enabled.
You have two options to authenticate to Azure Service Bus, either with Microsoft Entra ID or connection string. The following sections describe how to authenticate with both options. For optimal security, it is recommended to use Microsoft Entra ID for authentication.
Authenticating to Azure Service Bus with Microsoft Entra ID
You can authenticate to Azure Service Bus with Microsoft Entra ID. Run the following commands to assign the Azure Service Bus Data Owner role to the signed-in user as a Microsoft Entra identity.
SERVICEBUS_RESOURCE_ID=$(az servicebus namespace show \
    --resource-group rg-quarkus-azure-servicebus \
    --name sbnamespace20250604 \
    --query 'id' \
    --output tsv)
OBJECT_ID=$(az ad signed-in-user show --query id -o tsv)

az role assignment create \
    --role "Azure Service Bus Data Owner" \
    --assignee ${OBJECT_ID} \
    --scope $SERVICEBUS_RESOURCE_ID
Run the following commands to export the namespace of the Azure Service Bus as an environment variable.
export QUARKUS_AZURE_SERVICEBUS_NAMESPACE=sbnamespace20250604The value of environment variable QUARKUS_AZURE_SERVICEBUS_NAMESPACE will be read by Quarkus as the value of config property quarkus.azure.servicebus.namespace of azure-servicebus extension in order to set up the connection to the Azure Service Bus.
Authenticating to Azure Service Bus with connection string
You can also authenticate to Azure Service Bus with connection string. Run the following commands to export the connection string of the Azure Service Bus as an environment variable.
export QUARKUS_AZURE_SERVICEBUS_CONNECTION_STRING=$(az servicebus namespace authorization-rule keys list \
    --resource-group rg-quarkus-azure-servicebus \
    --namespace-name sbnamespace20250604 \
    --name RootManageSharedAccessKey \
    --query primaryConnectionString -o tsv)
The value of environment variable QUARKUS_AZURE_SERVICEBUS_CONNECTION_STRING will be read by Quarkus as the value of config property quarkus.azure.servicebus.connection-string of azure-servicebus extension in order to set up the connection to the Azure Service Bus.
Inject the Azure Service Bus Client Builder
Now that your Azure environment is ready and you have configured the extension, you can @Inject the com.azure.messaging.servicebus.ServiceBusClientBuilder object in your application, so you can create clients to interact with Azure Servie Bus.
For complete API see the Azure SDK for Java Reference Documentation.
Use the ServiceBusClientBuilder to create clients
@ApplicationScoped
public class ServiceBusManager {

    private static final Logger LOG = Logger.getLogger(ServiceBusManager.class);

    @ConfigProperty(name = "quarkus.azure.servicebus.queue-name", defaultValue = "test-queue")
    private String queueName;

    @Inject
    private ServiceBusClientBuilder clientBuilder;

    private ServiceBusSenderClient senderClient;
    private ServiceBusProcessorClient processorClient;

    // Thread-safe list to store received messages for testing
    private final List<String> receivedMessages = new CopyOnWriteArrayList<>();

    @PostConstruct
    void initialize() {
        LOG.info("Initializing Azure Service Bus clients");

        // Initialize sender client
        senderClient = clientBuilder
                .sender()
                .queueName(queueName)
                .buildClient();

        // Initialize processor client with message handler
        processorClient = clientBuilder
                .processor()
                .queueName(queueName)
                .receiveMode(ServiceBusReceiveMode.RECEIVE_AND_DELETE)
                .processMessage(context -> {
                    String body = context.getMessage().getBody().toString();
                    receivedMessages.add(body);
                    LOG.infof("Received message: %s", body);
                })
                .processError(context -> {
                    LOG.errorf("Error occurred: %s", context.getException());
                })
                .disableAutoComplete()
                .buildProcessorClient();

        // Start processing messages
        processorClient.start();

        LOG.info("Azure Service Bus clients initialized successfully");
    }

    @PreDestroy
    void cleanup() {
        LOG.info("Cleaning up Azure Service Bus clients");

        if (processorClient != null) {
            processorClient.close();
        }

        if (senderClient != null) {
            senderClient.close();
        }

        LOG.info("Azure Service Bus clients cleaned up successfully");
    }

    public void sendMessage(String messageBody) {
        LOG.infof("Sending message: %s", messageBody);

        ServiceBusMessage message = new ServiceBusMessage(messageBody);
        senderClient.sendMessage(message);

        LOG.info("Message sent successfully");
    }

    public List<String> getReceivedMessages() {
        return List.copyOf(receivedMessages);
    }
}
Send and retrieve messages in a REST resource
@Path("/quarkus-azure-servicebus")
@Produces(MediaType.APPLICATION_JSON)
@Consumes(MediaType.APPLICATION_JSON)
public class ServiceBusResource {

    private static final Logger LOG = Logger.getLogger(ServiceBusResource.class);

    @Inject
    ServiceBusManager serviceBusManager;

    @POST
    @Path("/messages")
    public Response sendMessage(Map<String, String> request) {
        String message = request.get("message");
        LOG.infof("REST request to send message: %s", message);
        serviceBusManager.sendMessage(message);

        return Response.ok(Map.of(
                "status", "success",
                "message", "Message sent successfully")).build();
    }

    @GET
    @Path("/messages")
    public Response getMessages() {
        List<String> messages = serviceBusManager.getReceivedMessages();
        LOG.infof("REST request to get messages, returning %d messages", messages.size());

        return Response.ok(Map.of(
                "status", "success",
                "count", messages.size(),
                "messages", messages)).build();
    }
}
To test this sample you can run the following cURL commands after the application is started:
-
curl http://localhost:8080/quarkus-azure-servicebus/messages -X POST -d '{"message": "Hello Azure Service Bus!"}' -H "Content-Type: application/json" -
curl http://localhost:8080/quarkus-azure-servicebus/messages
You should see similar outputs:
{"status":"success","message":"Message sent successfully"}
{"messages":["Hello Azure Service Bus!"],"status":"success","count":1}
When you’re done with the example and no longer need the Azure resources, run the following command to clean up the Azure resources you created before:
az group delete \
    --name rg-quarkus-azure-servicebus \
    --yes --no-wait
Dev Services
The Dev Services of this extension launch an Azure Service Bus emulator in dev and test mode.
The ServiceBusClientBuilder instances produced by this extension will be automatically configured to use the emulator’s connection string when running in dev or test mode through the quarkus.azure.servicebus.connection-string property.
Prerequisites
The Azure Service Bus emulator consists of two containers:
-
The Azure Service Bus emulator container
-
A Microsoft SQL Server database container
To use the Dev Services functionality, you must explicitly accept the license terms for both products:
-
Azure Service Bus Emulator EULA: View license
-
Microsoft SQL Server EULA: View license
You can accept both licenses by setting the following configuration:
quarkus.azure.servicebus.devservices.license-accepted=trueConfigure the Azure Service Bus emulator
The emulator is configured via a configuration file in JSON format. See this example for its syntax.
The configuration file is expected at src/main/azure/servicebus-emulator/config.json.
If it does not exist, a warning is issued and a fallback configuration
providing a queue "queue" and a topic "topic" with a subscription "subscription" is applied.
Disable the Dev Services
The Dev Services will not start under any of these conditions:
-
A Service Bus connection is configured via
quarkus.azure.servicebus.namespaceorquarkus.azure.servicebus.connection-string -
The Dev Services are explicitly disabled with
quarkus.azure.servicebus.devservices.enabled=false -
Global Dev Services are disabled with
quarkus.devservices.enabled=false
Dev Services Tutorial
See this tutorial project for how to take full advatage of the Azure Service Bus Dev Services.
Extension Configuration Reference
Configuration property fixed at build time - All other configuration properties are overridable at runtime
Configuration property |
Type |
Default |
|---|---|---|
The flag to enable the extension. If set to false, the CDI producers will be disabled. This flag does not affect Dev Services. To disable Dev Services, you must explicitly set either Environment variable: |
boolean |
|
Whether Dev Services should be enabled or not. Dev Services are enabled by default unless a specific Azure Service Bus connection exists. When Dev Services are enabled, Quarkus will attempt to automatically configure and start an Azure Service Bus emulator instance and an associated MSSQL Server when running in dev or test mode and when Docker is running. Environment variable: |
boolean |
|
To use the Azure Service Bus Dev Services, you must accept the license terms of the Azure Service Bus emulator and the Microsoft SQL Server. Environment variable: |
boolean |
|
Indicates if the Azure Service Bus emulator managed by Quarkus Dev Services is shared. When shared, Quarkus looks for running containers using label-based service discovery. If a matching container is found, it is used, and so a second one is not started. Otherwise, Dev Services for Azure Service Bus starts a new container. The discovery uses the Container sharing is only used in dev mode. Environment variable: |
boolean |
|
The value of the This property is used when you need multiple shared Azure Service Bus emulator instances. Environment variable: |
string |
|
The container image name of the Azure Service Bus emulator. See the artifact registry for available tags of the default image. The default image uses the This extension has been tested and verified working with version Environment variable: |
string |
|
Name and path of the Azure Service Bus emulator configuration file relative to the directory If you need custom configuration for different test scenarios, this property allows you to specify distinct configuration files for each test profile. If a configuration file is specified with this property, it must exist. If the property is not used, the path defaults to Environment variable: |
string |
|
The container image name of the Microsoft SQL Server required by the Azure Service Bus emulator. See the artifact registry for available tags of the default image. The default image uses the This extension has been tested and verified working with version Environment variable: |
string |
|
Connect to the Azure Service Bus using this connection string. If set, authentication is handled by the SAS key in the connection string. Otherwise, a DefaultAzureCredentialBuilder will be used for authentication, and namespace and domain have to be configured. Environment variable: |
string |
|
The namespace of the Azure Service Bus. The domain name is appended to this value to form the fully qualified namespace name. Environment variable: |
string |
|
The domain name of the Azure Service Bus. The domain name is appended to the namespace to form the fully qualified namespace name. Environment variable: |
string |
|
Quarkus Azure Blob Storage Extension
Quarkus Azure Services Extensions are developed and supported by Microsoft as part of their commitment to Open Standard Enterprise Java. For more information, see Jakarta EE on Azure.
Azure Blob Storage is a massively scalable and secure object storage for cloud-native workloads, archives, data lakes, high-performance computing, and machine learning.
This extension allows you to store and retrieve blobs from Azure Blob Storage by injecting a com.azure.storage.blob.BlobServiceClient or com.azure.storage.blob.BlobServiceAsyncClient object inside your Quarkus application.
This is a step by step guide on how to use the Quarkus Azure Blob Storage extension. If you’re looking for a complete code sample, you can find it in the Azure Blob Storage sample.
Installation
If you want to use this extension, you need to add the io.quarkiverse.azureservices:quarkus-azure-storage-blob extension first to your build file.
For instance, with Maven, add the following dependency to your POM file:
<dependency>
    <groupId>io.quarkiverse.azureservices</groupId>
    <artifactId>quarkus-azure-storage-blob</artifactId>
    <version>1.2.4</version>
</dependency>
How to Use It
Once you have added the extension to your project, follow the next steps, so you can inject com.azure.storage.blob.BlobServiceClient or com.azure.storage.blob.BlobServiceAsyncClient object in your application to store and read blobs.
Setup your Azure Environment
First thing first.
For this sample to work, you need to have an Azure account as well as Azure CLI installed.
The Azure CLI is available to install in Windows, macOS and GNU/Linux environments.
Checkout the installation guide.
Then, you need an Azure subscription and log into it by using the az login command.
You can run az version to find the version and az upgrade to upgrade to the latest version.
Create an Azure resource group with the az group create command. A resource group is a logical container into which Azure resources are deployed and managed.
az group create \
    --name rg-quarkus-azure-storage-blob \
    --location eastus
Create a general-purpose storage account with the following command:
az storage account create \
--name stquarkusazurestorageblo \
--resource-group rg-quarkus-azure-storage-blob \
--location eastus \
--sku Standard_ZRS \
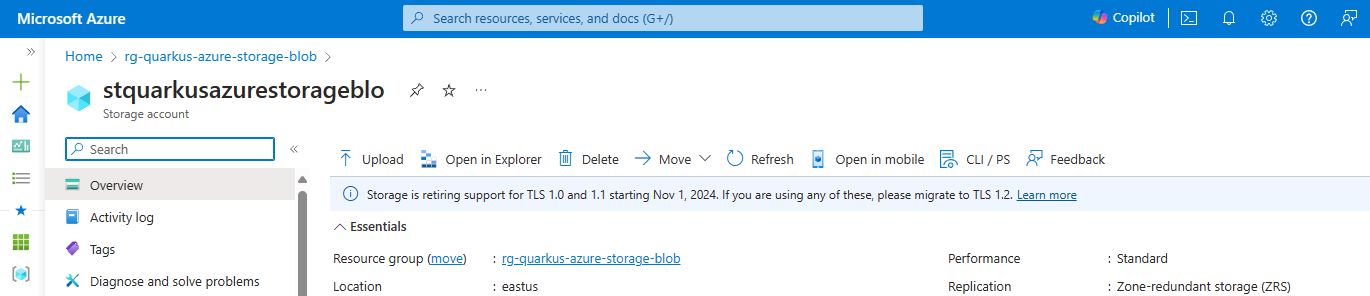
--encryption-services blobIf you log into the Azure portal, you can see the resource group and the storage account you created.
Blobs are always uploaded into a container. You can organize groups of blobs in containers similar to the way you organize your files on your computer in folders. This guide will use the Azure Storage Blob client to create the container if it doesn’t exist. Alternatively, follow instructions in Create a container if you want to create a container before uploading blobs.
Configure the Azure Storage Blob Client
As you can see below in the Configuration Reference section, either the property quarkus.azure.storage.blob.endpoint or the property quarkus.azure.storage.blob.connection-string is required if the extension is enabled.
You have two options to authenticate to Azure Storage Blob, either with Microsoft Entra ID or connection string. The following sections describe how to authenticate with both options. For optimal security, it is recommended to use Microsoft Entra ID for authentication.
Authenticating to Azure Storage Blob with Microsoft Entra ID
You can authenticate to Azure Storage Blob with Microsoft Entra ID. Run the following commands to assign the Storage Blob Data Contributor role to the signed-in user as a Microsoft Entra identity.
# Retrieve the storage account resource ID
STORAGE_ACCOUNT_RESOURCE_ID=$(az storage account show \
    --resource-group rg-quarkus-azure-storage-blob \
    --name stquarkusazurestorageblo \
    --query 'id' \
    --output tsv)
# Assign the "Storage Blob Data Contributor" role to the current signed-in identity
az role assignment create \
    --assignee $(az ad signed-in-user show --query 'id' --output tsv) \
    --role "Storage Blob Data Contributor" \
    --scope $STORAGE_ACCOUNT_RESOURCE_ID
Then, export Azure Storage Blob endpoint as an environment variable.
export QUARKUS_AZURE_STORAGE_BLOB_ENDPOINT=$(az storage account show \
    --resource-group rg-quarkus-azure-storage-blob \
    --name stquarkusazurestorageblo \
    --query 'primaryEndpoints.blob' \
    --output tsv)
echo "QUARKUS_AZURE_STORAGE_BLOB_ENDPOINT is: ${QUARKUS_AZURE_STORAGE_BLOB_ENDPOINT}"
The value of environment variable QUARKUS_AZURE_STORAGE_BLOB_ENDPOINT will be read by Quarkus as the value of config
property quarkus.azure.storage.blob.endpoint in order to set up the connection to the Azure Storage Blob.
Authenticating to Azure Storage Blob with connection string
You can also authenticate to Azure Storage Blob with connection string. Run the following commands to export the Azure Storage Blob connection string as an environment variable.
export QUARKUS_AZURE_STORAGE_BLOB_CONNECTION_STRING=$(az storage account show-connection-string \
    --resource-group rg-quarkus-azure-storage-blob \
    --name stquarkusazurestorageblo \
    --output tsv)
echo "QUARKUS_AZURE_STORAGE_BLOB_CONNECTION_STRING is: ${QUARKUS_AZURE_STORAGE_BLOB_CONNECTION_STRING}"
The value of environment variable QUARKUS_AZURE_STORAGE_BLOB_CONNECTION_STRING will be fed into config
property quarkus.azure.storage.blob.connection-string in order to set up the connection to the Azure Storage Blob.
Notice that you get the connection string and set it to environment variable QUARKUS_AZURE_STORAGE_BLOB_CONNECTION_STRING, instead of setting it to property quarkus.azure.storage.blob.connection-string in the application.properties file.
Although technically both approaches work, using environment variable is recommended and more secure as there’s no risk of committing the connection string to source control.
Inject the Azure Storage Blob Client
Now that your Azure environment is ready and that you have configured the extension, you can inject the com.azure.storage.blob.BlobServiceClient object in your imperative application or inject the com.azure.storage.blob.BlobServiceAsyncClient object in your reactive application, so you can interact with Azure Blob Storage.
Use the BlobServiceClient in an imperative application
The uploadBlob method first creates the container container-quarkus-azure-storage-blob, sets some text to a text file, and then uploads the text to the container.
The downloadBlob method downloads the text file from the container and prints the text to the console.
@Path("/quarkus-azure-storage-blob")
@ApplicationScoped
public class StorageBlobResource {

    @Inject
    BlobServiceClient blobServiceClient;

    @POST
    public Response uploadBlob() {
        BlobContainerClient blobContainerClient = blobServiceClient
                .createBlobContainerIfNotExists("container-quarkus-azure-storage-blob");
        BlobClient blobClient = blobContainerClient.getBlobClient("quarkus-azure-storage-blob.txt");
        blobClient.upload(BinaryData.fromString("Hello quarkus-azure-storage-blob at " + LocalDateTime.now()), true);

        return Response.status(CREATED).build();
    }

    @GET
    public String downloadBlob() {
        BlobContainerClient blobContainerClient = blobServiceClient
                .getBlobContainerClient("container-quarkus-azure-storage-blob");
        BlobClient blobClient = blobContainerClient.getBlobClient("quarkus-azure-storage-blob.txt");

        return blobClient.downloadContent().toString();
    }
}
To test this sample you can run the following cURL commands after the application is started:
-
curl -X POST localhost:8080/quarkus-azure-storage-blob -
curl localhost:8080/quarkus-azure-storage-blob
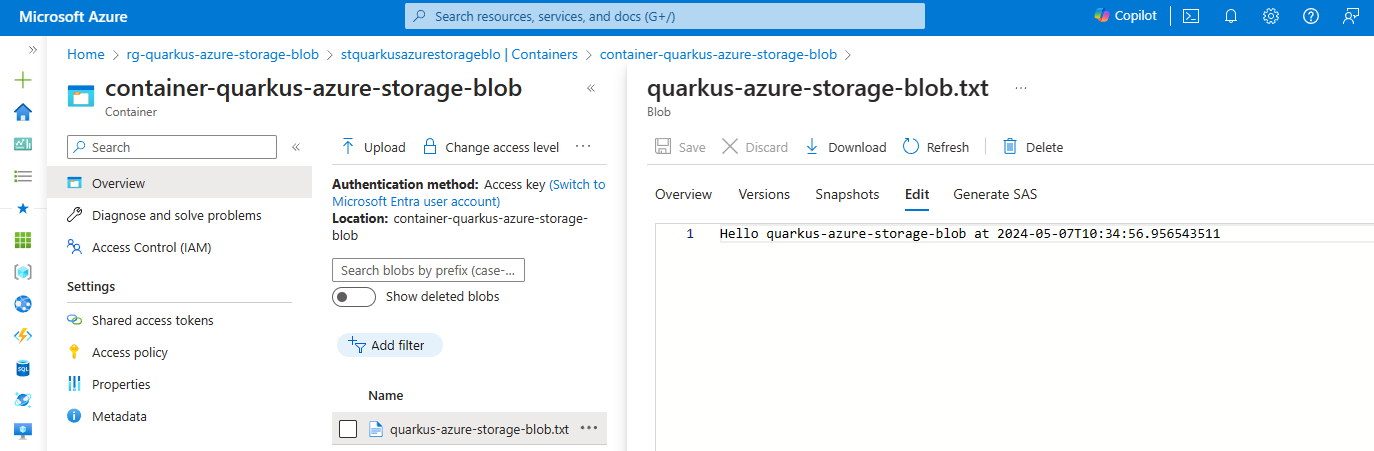
You can go back to the Azure portal and see the container container-quarkus-azure-storage-blob and the blob quarkus-azure-storage-blob.txt that you’ve created.
Use the BlobServiceAsyncClient in a reactive application
Similarly, the uploadBlob method first asynchronously creates the container container-quarkus-azure-storage-blob-async, sets some text to a text file, and then uploads the text to the container.
The downloadBlob method asynchronously downloads the text file from the container and prints the text to the console.
@Path("/quarkus-azure-storage-blob-async")
@ApplicationScoped
public class StorageBlobAsyncResource {

    @Inject
    BlobServiceAsyncClient blobServiceAsyncClient;

    @POST
    public Uni<Response> uploadBlob() {
        Mono<BlockBlobItem> blockBlobItem = blobServiceAsyncClient
                .createBlobContainerIfNotExists("container-quarkus-azure-storage-blob-async")
                .map(it -> it.getBlobAsyncClient("quarkus-azure-storage-blob-async.txt"))
                .flatMap(it -> it.upload(BinaryData.fromString("Hello quarkus-azure-storage-blob-async at " + LocalDateTime.now()), true));

        return Uni.createFrom().completionStage(blockBlobItem.toFuture()).map(it -> Response.status(CREATED).build());
    }

    @GET
    public Uni<Response> downloadBlob() {
        BlobAsyncClient blobAsyncClient = blobServiceAsyncClient.getBlobContainerAsyncClient("container-quarkus-azure-storage-blob-async")
                .getBlobAsyncClient("quarkus-azure-storage-blob-async.txt");

        return Uni.createFrom()
                .completionStage(blobAsyncClient.downloadContent().map(it -> Response.ok().entity(it.toString()).build())
                        .toFuture());
    }
}
To test this sample you can run the following cURL commands after the application is started:
-
curl -X POST localhost:8080/quarkus-azure-storage-blob-async -
curl localhost:8080/quarkus-azure-storage-blob-async
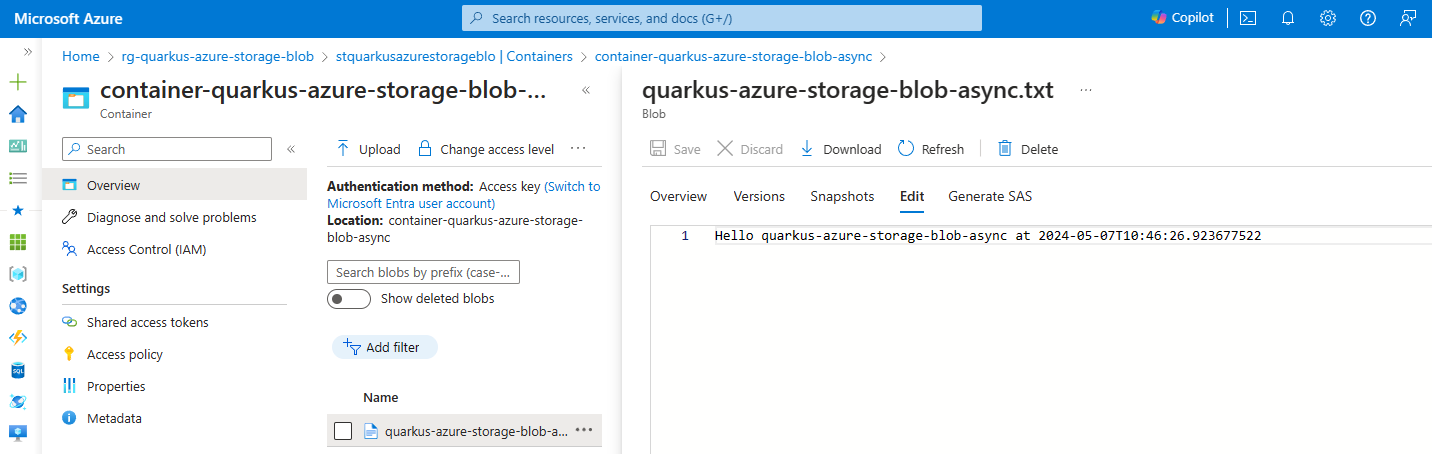
You can also go back to the Azure portal and see the container container-quarkus-azure-storage-blob-async and the blob quarkus-azure-storage-blob-async.txt that you’ve created.
Extension Configuration Reference
Configuration property fixed at build time - All other configuration properties are overridable at runtime
Configuration property |
Type |
Default |
|---|---|---|
Whether a health check is published in case the smallrye-health extension is present. Environment variable: |
boolean |
|
If DevServices has been explicitly enabled or disabled. DevServices is generally enabled by default, unless there is an existing configuration present. When DevServices is enabled Quarkus will attempt to automatically configure and start an azurite instance when running in Dev or Test mode and when Docker is running. Environment variable: |
boolean |
|
The container image name to use, for container based DevServices providers. Environment variable: |
string |
|
Optional fixed port the Dev services will listen to. If not defined, the port will be chosen randomly. Environment variable: |
int |
|
Indicates if the azurite instance managed by Quarkus Dev Services is shared. When shared, Quarkus looks for running containers using label-based service discovery. If a matching container is found, it is used, and so a second one is not started. Otherwise, Dev Services for Azure Storage Blob starts a new container. The discovery uses the Container sharing is only used in dev mode. Environment variable: |
boolean |
|
The value of the This property is used when you need multiple shared azurite instances. Environment variable: |
string |
|
By default, Azurite will check the request API version is valid API version. If this property is set to true, the API version check will be skipped, and the request with any API version will be accepted. Environment variable: |
boolean |
|
The flag to enable the storage blob. If set to false, the storage blob will be disabled Environment variable: |
boolean |
|
The endpoint of Azure Storage Blob. Required if quarkus.azure.storage.blob.enabled is set to true and quarkus.azure.storage.blob.connection-string is not set Environment variable: |
string |
|
The connection string of Azure Storage Blob. Required if quarkus.azure.storage.blob.enabled is set to true and quarkus.azure.storage.blob.endpoint is not set Environment variable: |
string |